Deposit USDC on Hyperliquid in 7 Steps — The Safe-Path Walkthrough
You are one click away from a CEX withdrawal you cannot reverse. Before you press it, here is the seven-step safe path from a Binance/Bybit balance to a funded Hyperliquid account — with the verification you need to do after every single step.
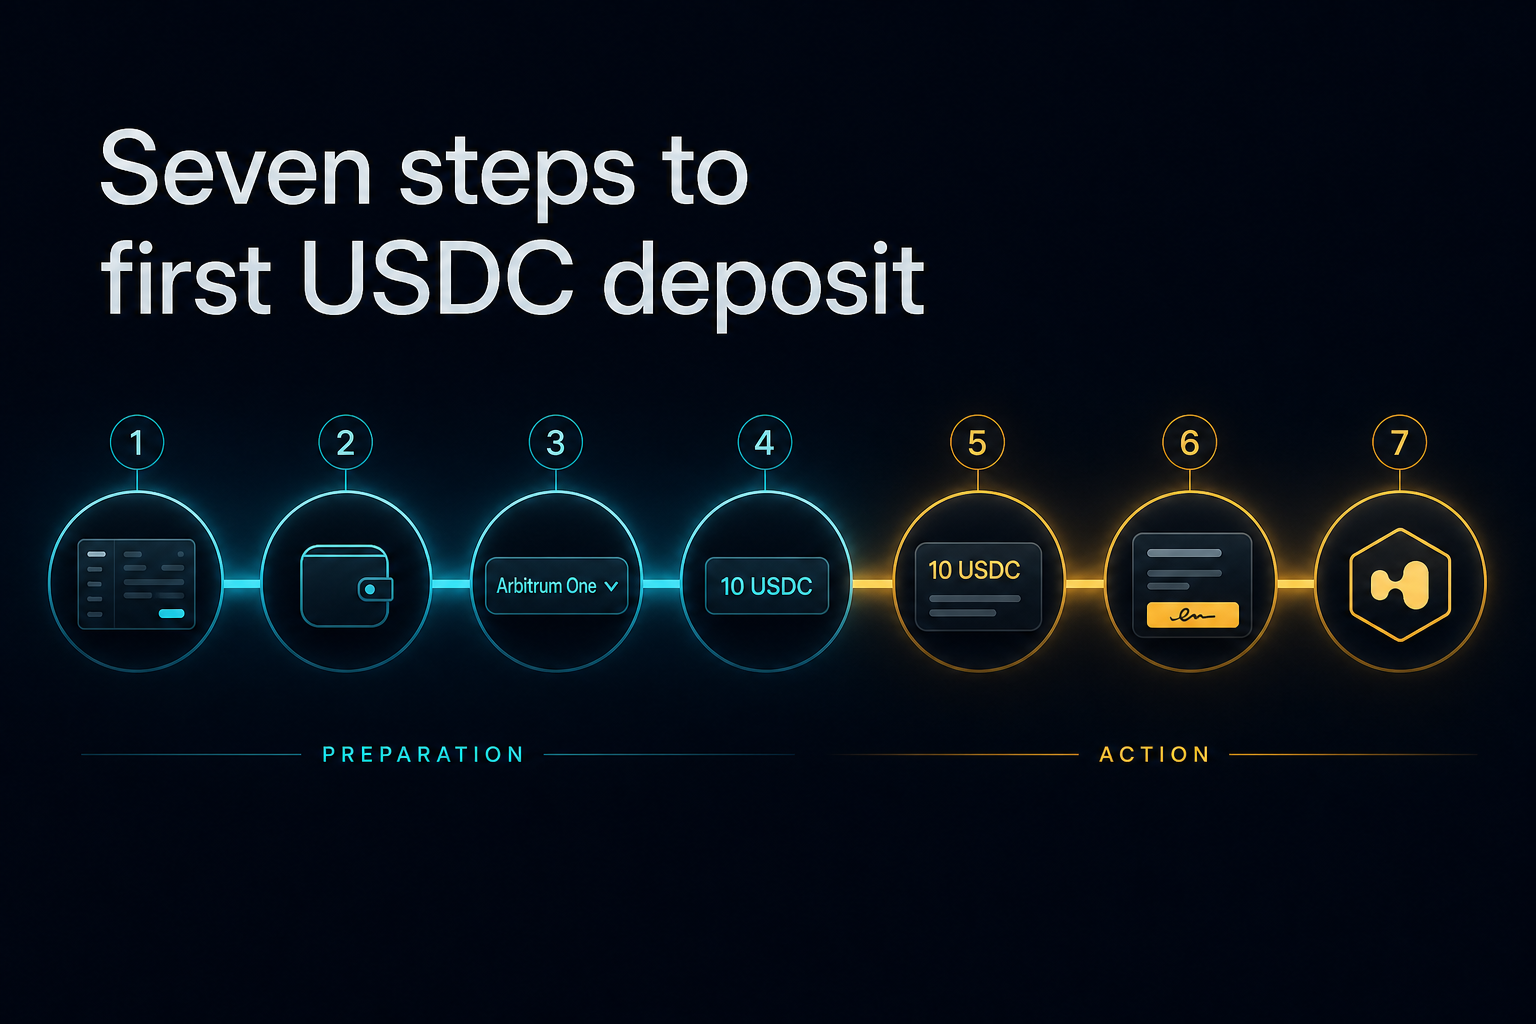
PPT / card-news flow outline
Each frame is one step the reader actually performs.

Before You Click "Withdraw" on Your CEX
The first deposit is the only step in your entire trading career where one wrong checkbox can move every dollar you have into a place you cannot pull it back from. After this article, that risk is mostly behind you — but right now, with USDC still sitting on Binance or Bybit, it is in front of you.
The safe path is not complicated. It is five custody hops, in one direction, with one verification after each hop.

Step 1–2: The Wallet, and the One Network Setting That Matters
Why Arbitrum One, specifically
Hyperliquid's deposit bridge listens on one network: Arbitrum One. Not Ethereum mainnet, not Arbitrum Nova, not Optimism, not Base. Picking the wrong network is the single most common way beginners lose funds during the first deposit, and customer support cannot reverse it.

The recovery phrase rule that overrides everything else
When you install a self-custody wallet — MetaMask is fine for this walkthrough — it will show you a recovery phrase. That phrase is the wallet. Whoever has it owns the money. Three rules, in priority order:
Write it on paper. Not on your phone. Not in a notes app. Not in cloud-synced anything.
No legitimate website, support agent, or browser extension will ever ask for it.
If you doubt your storage method, fix that before you put any meaningful USDC into the wallet.
Step 3–5: The Withdraw → Test → Send Pattern
This pattern is what separates beginners who lose money from beginners who don't.

The 10 USDC test transfer (why this is non-negotiable)
Before sending your full balance to a new address, on a new network, for the first time, send exactly 10 USDC. Wait for it to arrive in the wallet. Confirm it on a block explorer if you want belt-and-suspenders. Only then move the rest.
10 USDC is the price of one inexpensive lunch. The information it buys you — "this address, on this network, actually receives funds correctly" — is the cheapest insurance in trading.
When the test does not arrive
Check the CEX's withdrawal page — the transaction may still be "pending review".
Look up the transaction hash in Arbiscan and confirm the destination address matches your wallet exactly.
Confirm the network on the CEX side actually says "Arbitrum One" and not "Arbitrum Nova" or "Ethereum".
Do not retry by re-sending the full balance. Diagnose first.
Step 6–7: Sign In to Hyperliquid and Bridge Funds
"Sign" vs "Send" — the only two prompts you must learn to tell apart
When you click "Connect" on app.hyperliquid.xyz, your wallet pops up a signature request. It is free, it does nothing on-chain, it just proves you control the wallet. Approve it.
When you click "Deposit" and choose an amount, your wallet pops up a transaction request. It costs a tiny amount of ETH on Arbitrum and actually moves USDC. Read what it says before approving it.

What it costs (and what it does not)
The deposit transaction itself pays a small Arbitrum gas fee. Once your funds are on Hyperliquid's own chain, you pay no per-trade gas; you only pay the exchange's maker/taker fees.
One thing the deposit does not do: it does not lock your USDC. You can withdraw it back out the moment the deposit confirms.
Withdrawing Back to Your Wallet in 1–5 Minutes
Practising a small withdrawal back to your own wallet is the last step of the safe path, and the one most beginners skip. Don't.
Pull, say, $50 of USDC from your Hyperliquid trading account back to your Arbitrum wallet. In most cases it arrives within 1 to 5 minutes. Once it does, you have proved the entire round trip works.
Remember: to send USDC out of your wallet anywhere, you need a tiny amount of ETH on Arbitrum to pay the network fee. A few dollars of ETH is enough for many months.
Six Mistakes That Actually Cost Beginners Money
These are not theoretical. The list splits cleanly into two halves: the unrecoverable ones (read these slowly), and the recoverable ones (still worth avoiding).
Severe / high rows first — there is no support team for these.

Now the recoverable half — these cost time or small money, not the principal.

Your Next Step After Your First Deposit
You now have USDC sitting on Hyperliquid, you know how to take it back out, and you can tell a sign prompt from a transaction prompt.
Educational content. Not investment advice. Trading perpetual futures involves risk of loss, including the full position. Wallet operations are irreversible. External: Hyperliquid documentation · Open an account on Hyperliquid (referral link, soft mention).
Further Reading
Hyperliquid in 6 Minutes: The Trader's Cheat Sheet from CEX to On-Chain Perps
If you can read a Binance order book, you can already trade on Hyperliquid — but the account underneath looks nothing like one. Here is what changes, and what to check first.
Leverage on Hyperliquid: How Far Are You From Liquidation, Really?
Higher leverage shortens your distance to liquidation. Here is how Cross and Isolated margin behave on Hyperliquid, what the margin ratio actually measures, and when to dial leverage back.
Market vs Limit Orders on Hyperliquid: Which One You Click First
Market orders execute instantly at the best available price. Limit orders give you exact price control and lower fees. Here is how to choose on Hyperliquid, with a beginner-safe default.